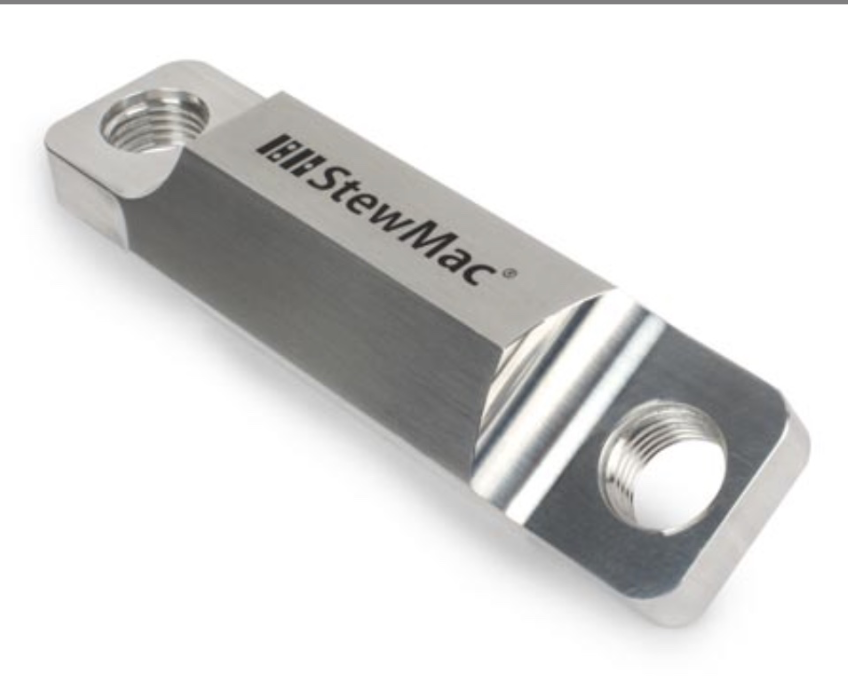
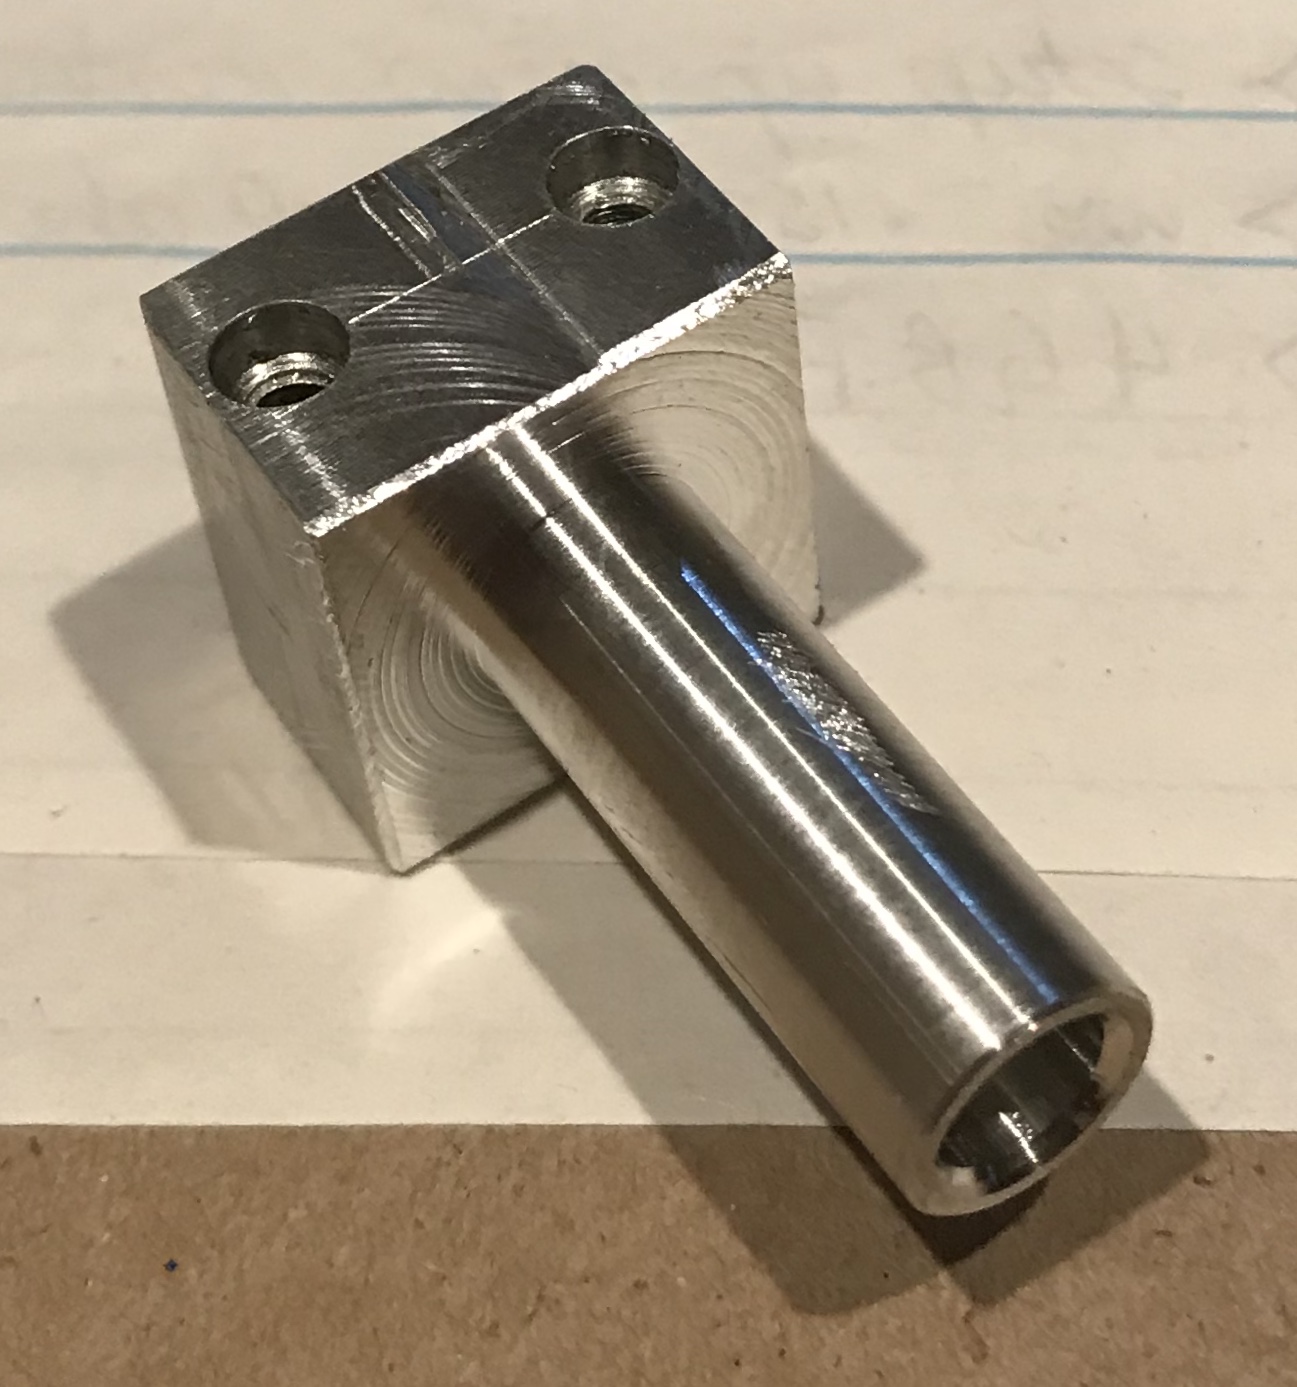
I saw a clamp on the StewMac website for holding the Dremel rotary tool securely in a vise. It seemed like a valuable Dremel accessory to have so I decided to replicate it. Judging by the picture it is about 5" long and made from 1 1/4" hex.
I purchased 1 3/8" aluminum hex from Amazon as it was inexpensive. The threaded hole for the Dremel needs to be 3/4-12, so the flats were planned to be 1 1/4" long. One of the flats is aligned with the angles of the hex and the other with the hex sides. The threaded portion of the Dremel is 7/16" long, so the flats were planned at 7/16" thick.
A 10" long purchased aluminum bar was cut in two with the hacksaw. Both ends were carefully faced on the Sherline lathe. The ends and sides were blued and lines scribed for the flats. A hacksaw was used to cut in from the sides and down from the ends of the marked bar. Four pieces of aluminum were removed leaving 1/16-1/8" on all sides of the flat. A lot of work, but the exercise is always valuable.
The facing operation mentioned above was quite risky and had to be done by removing only 0.003" per pass. A jig for the steady rest to hold hex stock would be ideal.
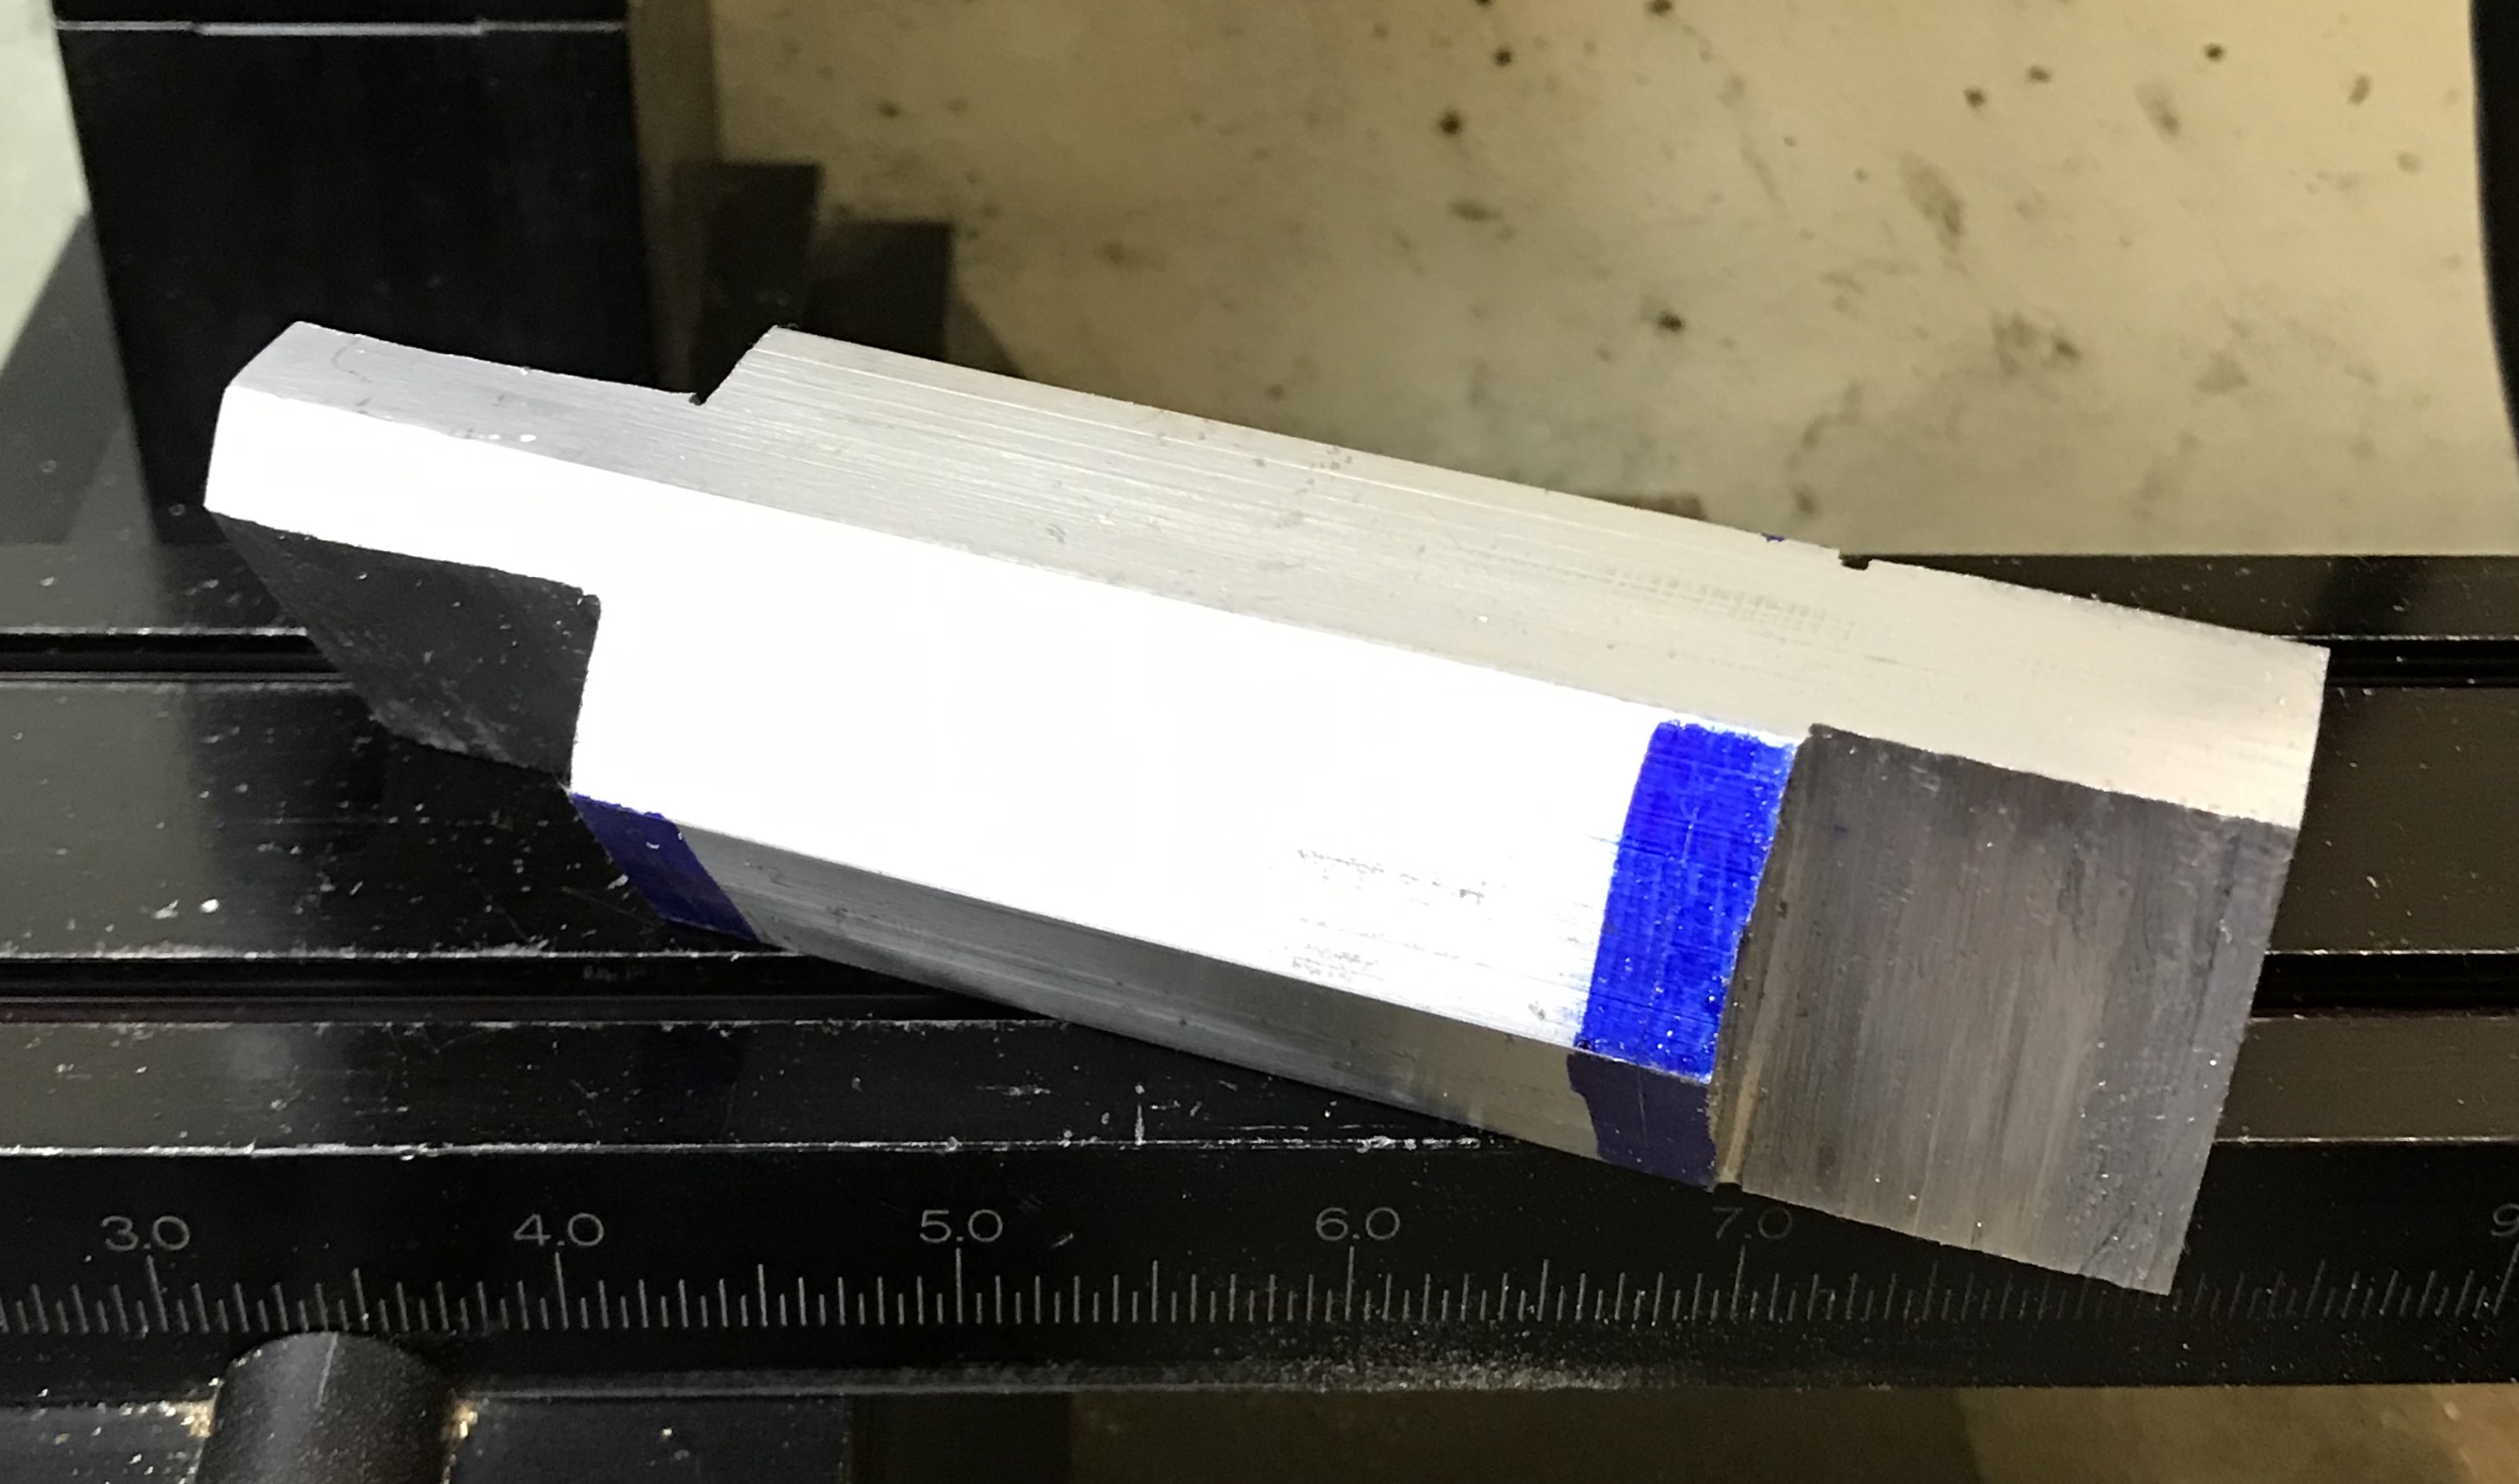
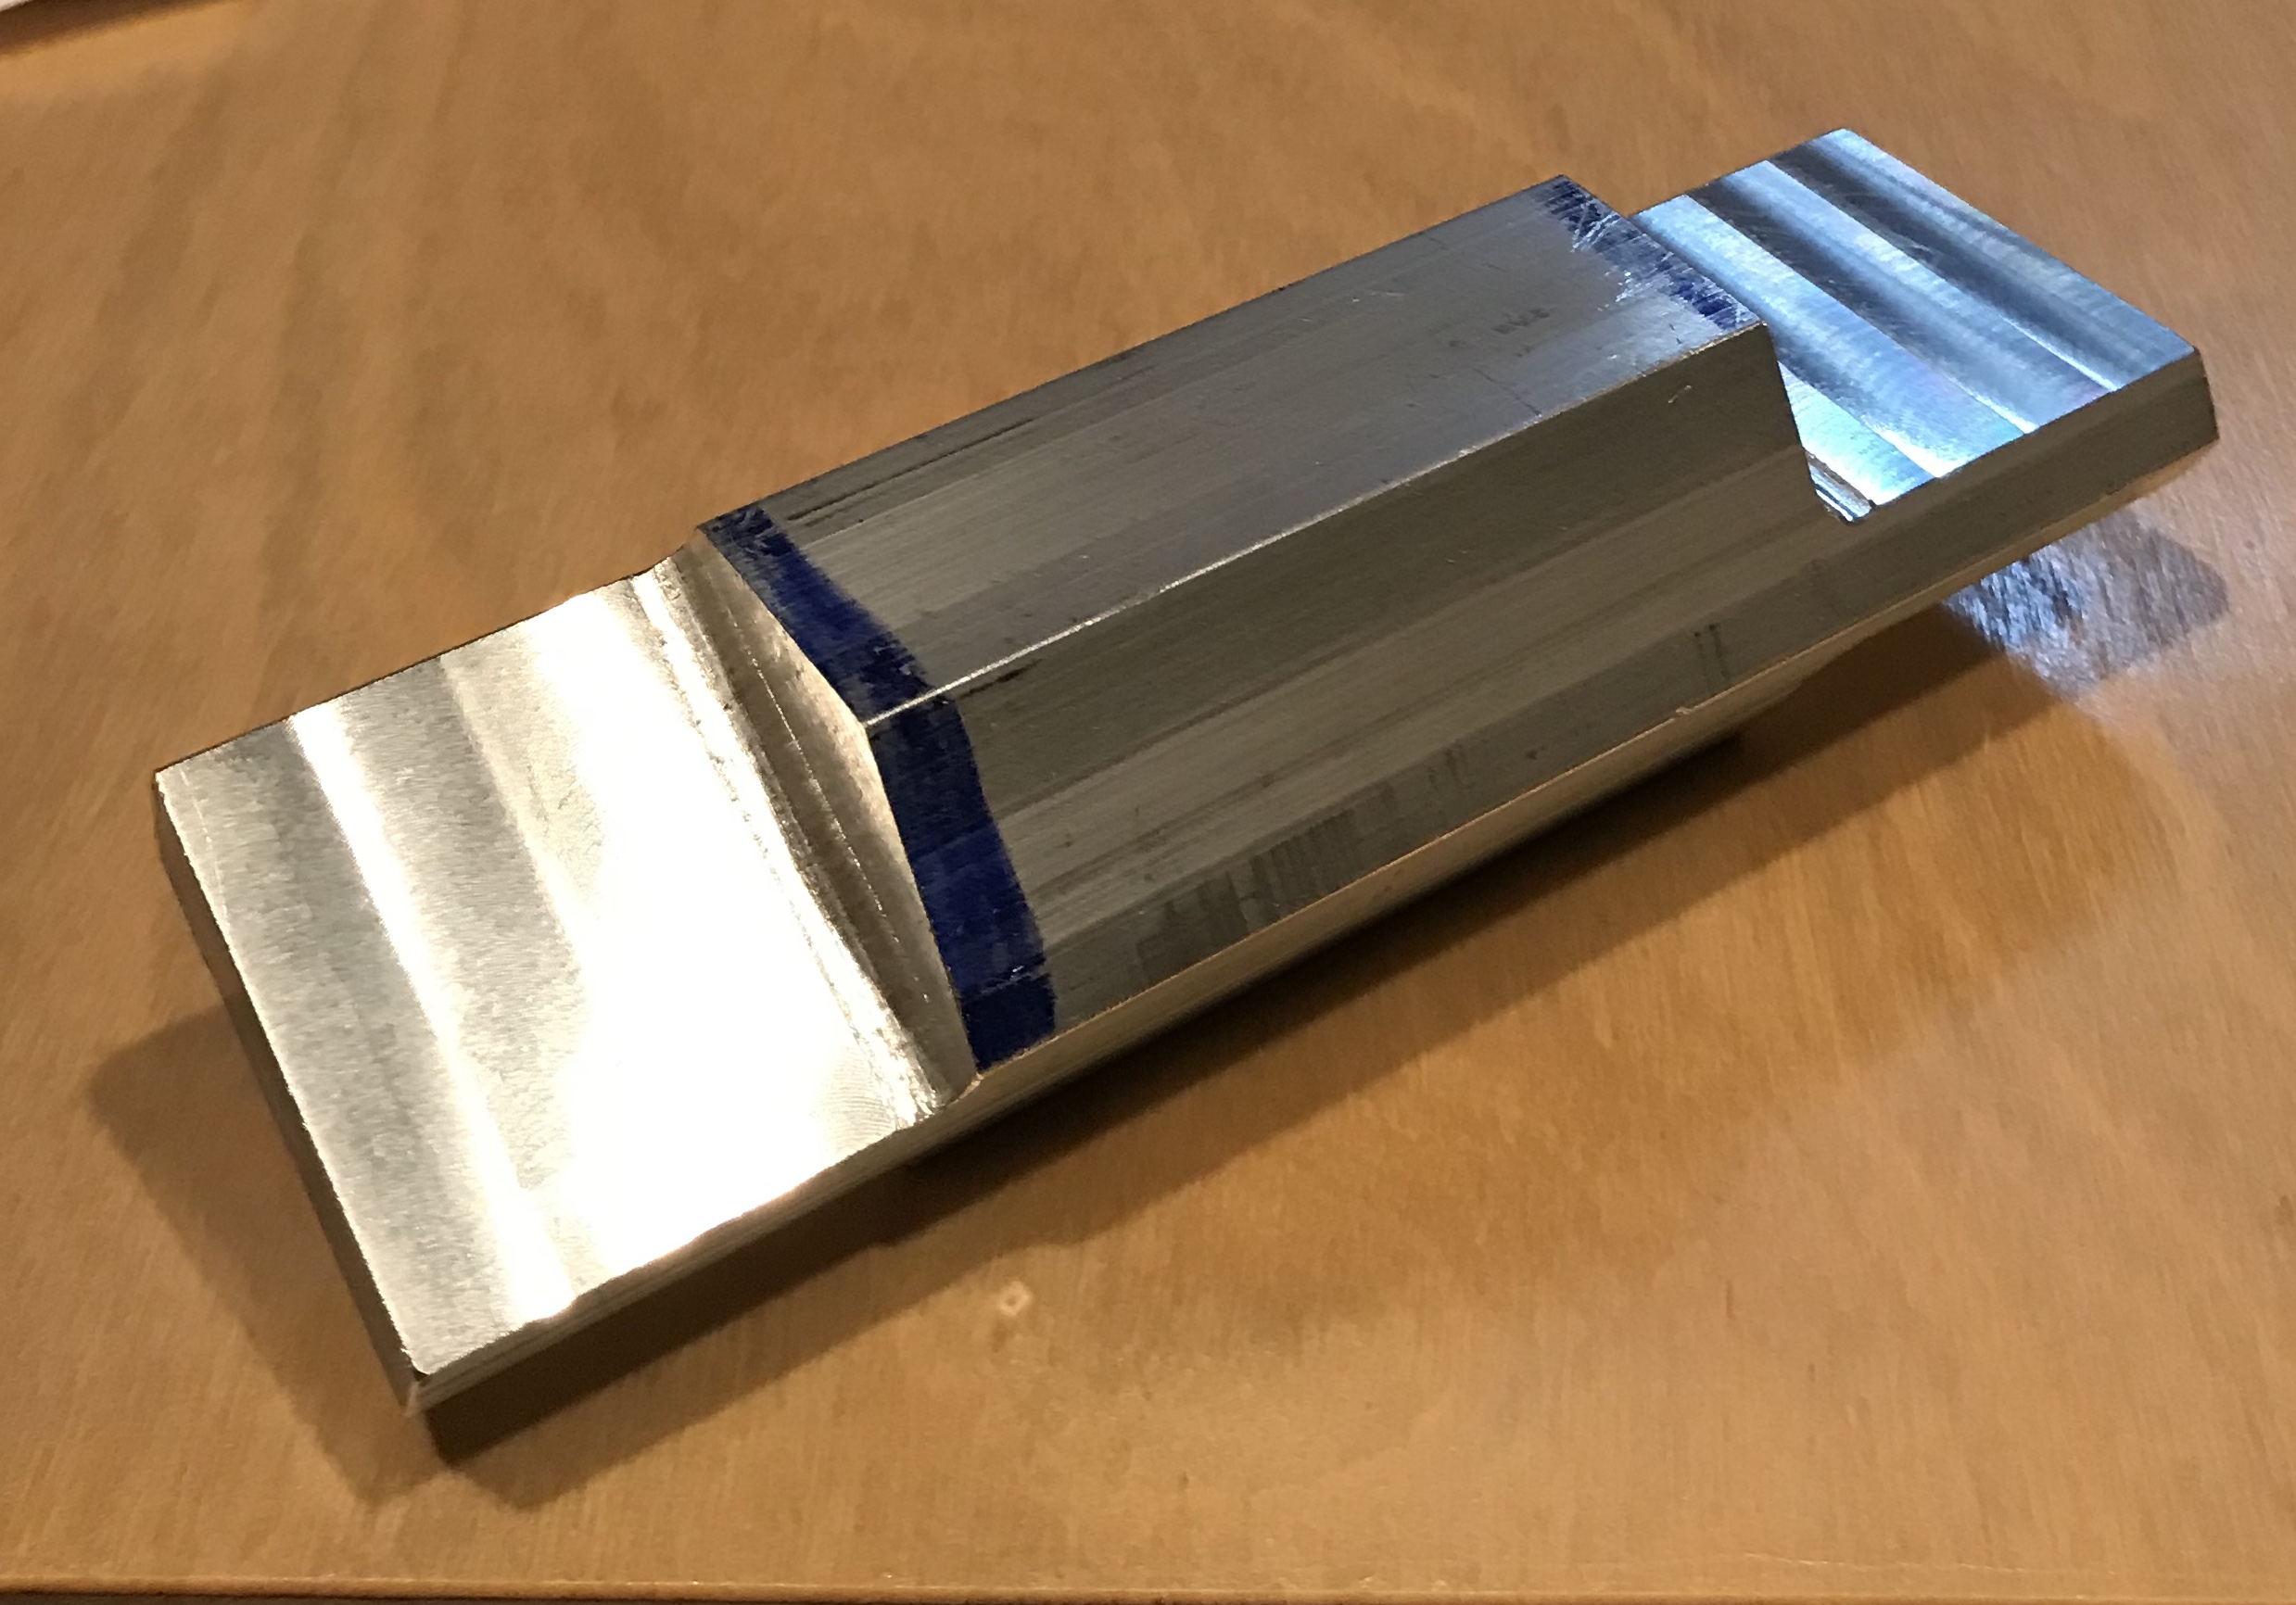
The rough cut bar was placed in the vise holding opposite flat sides with one flat extended beyond the jaws of the vise. This flat was supported with a machinist's jack and the top surface of the flat was cut to the line with the 2-insert mill. Only about 0.0075" was removed per pass, but little vibration resulted in a clean face. Switched to the 5/16" end mill which is very sharp. This was used to cut the side next to the center. This was cut to the line and then cut down to about 1/16" from the flat. The resulting "corner" was rounded out with a 1/4" ball end mill. The bar was flipped over and the cut repeated on the other side of the same flat. In place of the 2-insert mill the 5/16" end mill was used for cutting the flat surface and removed about 0.015" per pass and left a great finish. A very nice cutter! The flat was then deburred all over with a small file.
The same process was repeated for the other end. Except the aluminum hex could not be held in the vise. For this end the top and bottom of the bar were flat. The bar was held with two strap clamps on top of a 1" round of aluminum and aligned with the y-axis. A photo of the finished flats is shown below.
The next question to be answered is whether to round the corners. If so, this should be done after drilling 1/4" holes in the flats so the rotary table can be used. Even more important is how to tap the hole. The cheapest 3/4-12 tap available is about $25. It will be a challenge to cut the threads on the Sherline with the cutter in the boring head!!! Have decided to not round the corners, I like the massive look. Threading will be first attempted on the Sherline lathe. A threading tool needs to be made to fit the boring head (or an adapter needs to be made so the square internal threading tool can be used).
Decided to try to make an adapter for the 1/4" square shaft of the internal threading tool to fit the 3/8" round boring bar holder. A 1 1/2" X 3/4" piece of aluminum was cut with a hacksaw and squared up in the mill. One end was marked for two holes, 1/4" from the end and both 3/32" in from the sides. A #43 drill was drilled through, followed by a #31 drill halfway through for thread clearance, followed by a #12 drill 0.10" deep for screw head clearance. The hole bottoms were threaded 4-40. The idea is to make the holder and then cut it in half using the two screws to hold it together. The end with the screw holes was centered in the four jaw chuck. It was drilled and reamed to 1/4" completely through. The hole was lightly chamfered. One inch of the block was reduced to 0.375". This end is a nice slip fit into the boring tool holder.
To complete the jig it must be sawed in half lengthwise and 1/4" channels milled down the center of the 1/4" semi-circular grooves.
Sometimes it pays to have a sleepless night (or "not sleep on it"). I missed two simple and obvious potential ways to achieve the desired threaded holes in the ends of the clamp. First, clamp the internal threading tool directly in the boring head. The screw holding the tool needs to be replaced with one a little longer, but it certainly seems sufficiently rigid. A little packing might make it even more rigid. The second possibility is to bore the holes in the clamp oversize and make a threaded insert with a pressfit. This latter idea is most likely the simplest idea of all!
Switched to the insert approach. A 1 1/2" length of 1" brass round bar was cut off with a hacksaw. Both ends were faced in the lathe and the outside was cleaned up leaving a diameter of 0.993". A center hole was drilled through up to 7/16". The diameter was opened to 0.665" with the Sherline boring bar in increments of 0.010". Due to the length of the boring bar the hole was widened for a length of only 0.875.
The first length was cut off at 0.46" to match the thickest end. The boring was then finished the remainder of the depth (0.5"). The second part was parted off and both ends of both pieces were chamfered on the inside of the hole. The lathe was set up for threading 3/4-12. The threads were cut to a depth of 0.045-0.050" and the dremel fit nicely.
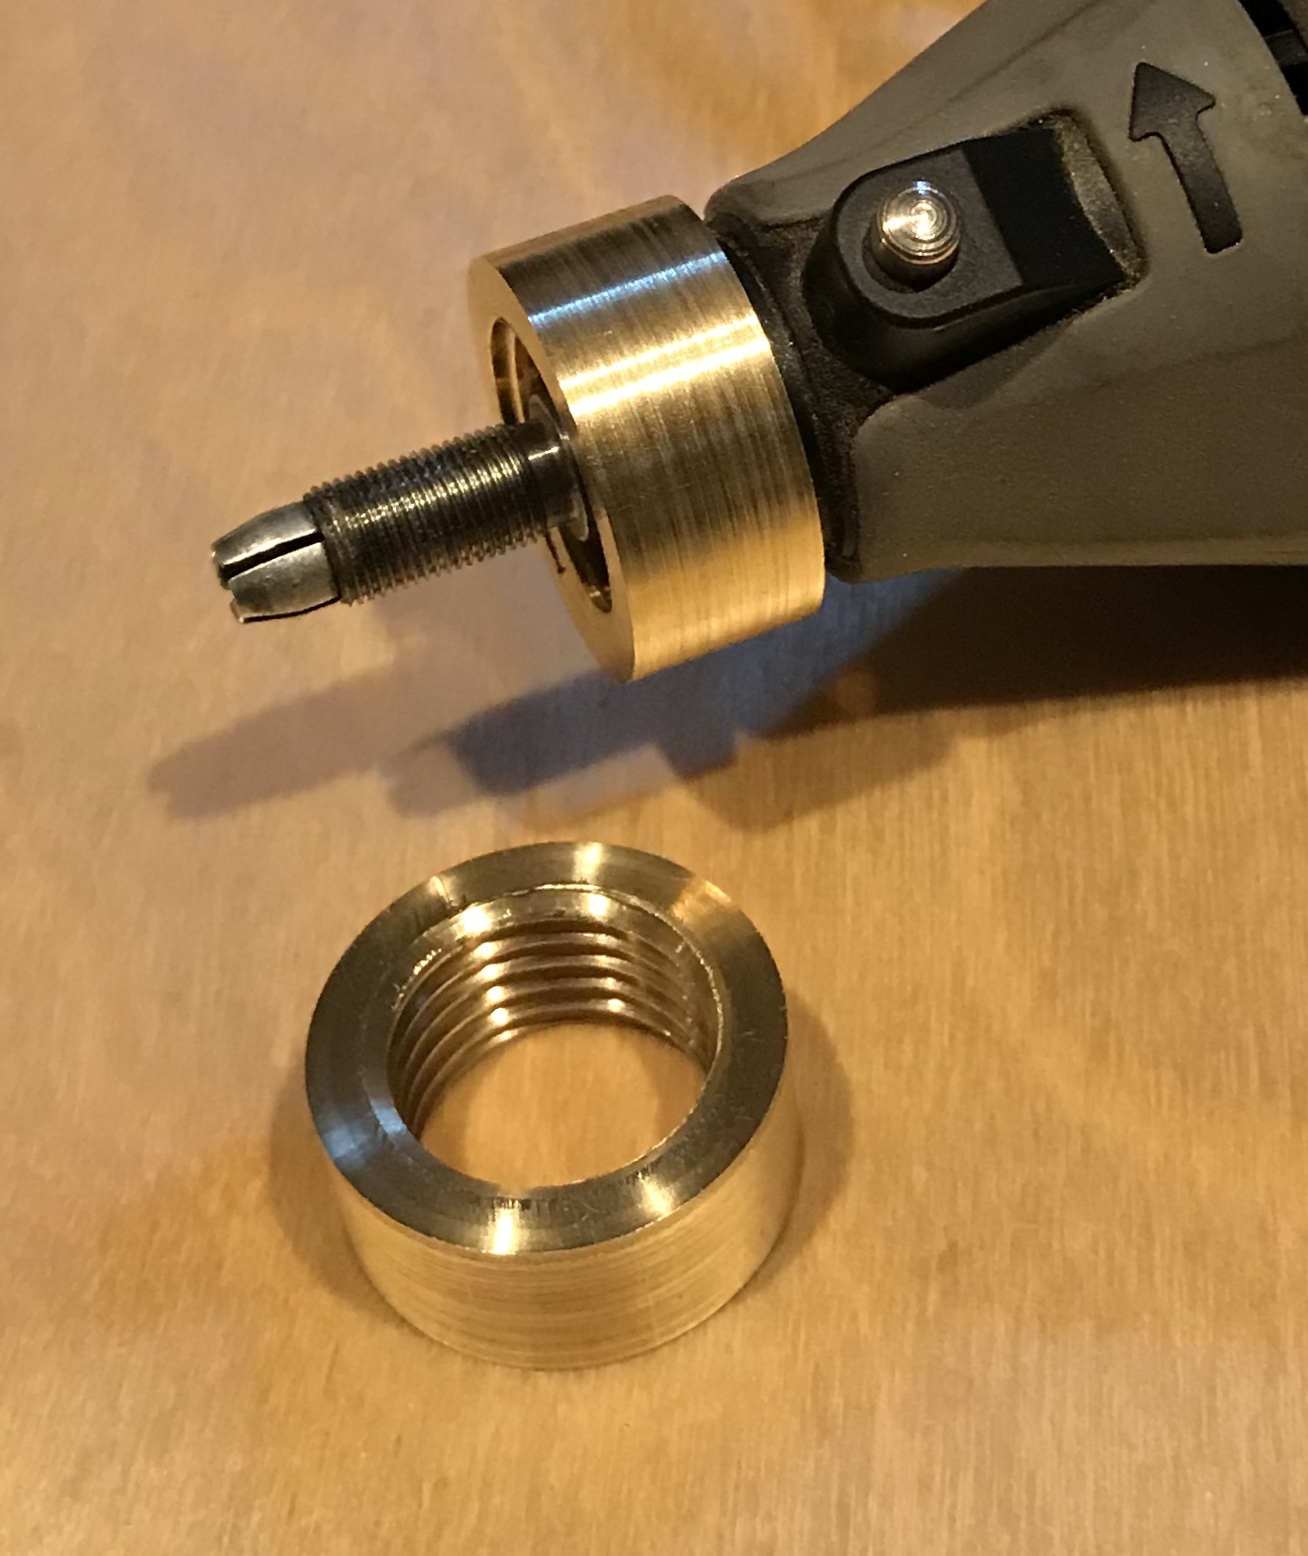
The clamp was returned to the vise in the mill and a hole was drilled centered in one end to 7/16". The hole was then bored. At around 0.810" the hole was measured with the hole gauge. I was having trouble with repeatability getting anywhere from 0.808 - 0.810". I will need to practice before boring the hole to size (0.992"). Finally seemed to measure at 0.992" after carefully sneaking up on the final measurement. Chamfered one end of the insert and took it to the vise. At the limits of my strength I was able to get it completely inserted. There is some aluminum forced out the back side!! Looks great after milling it off.
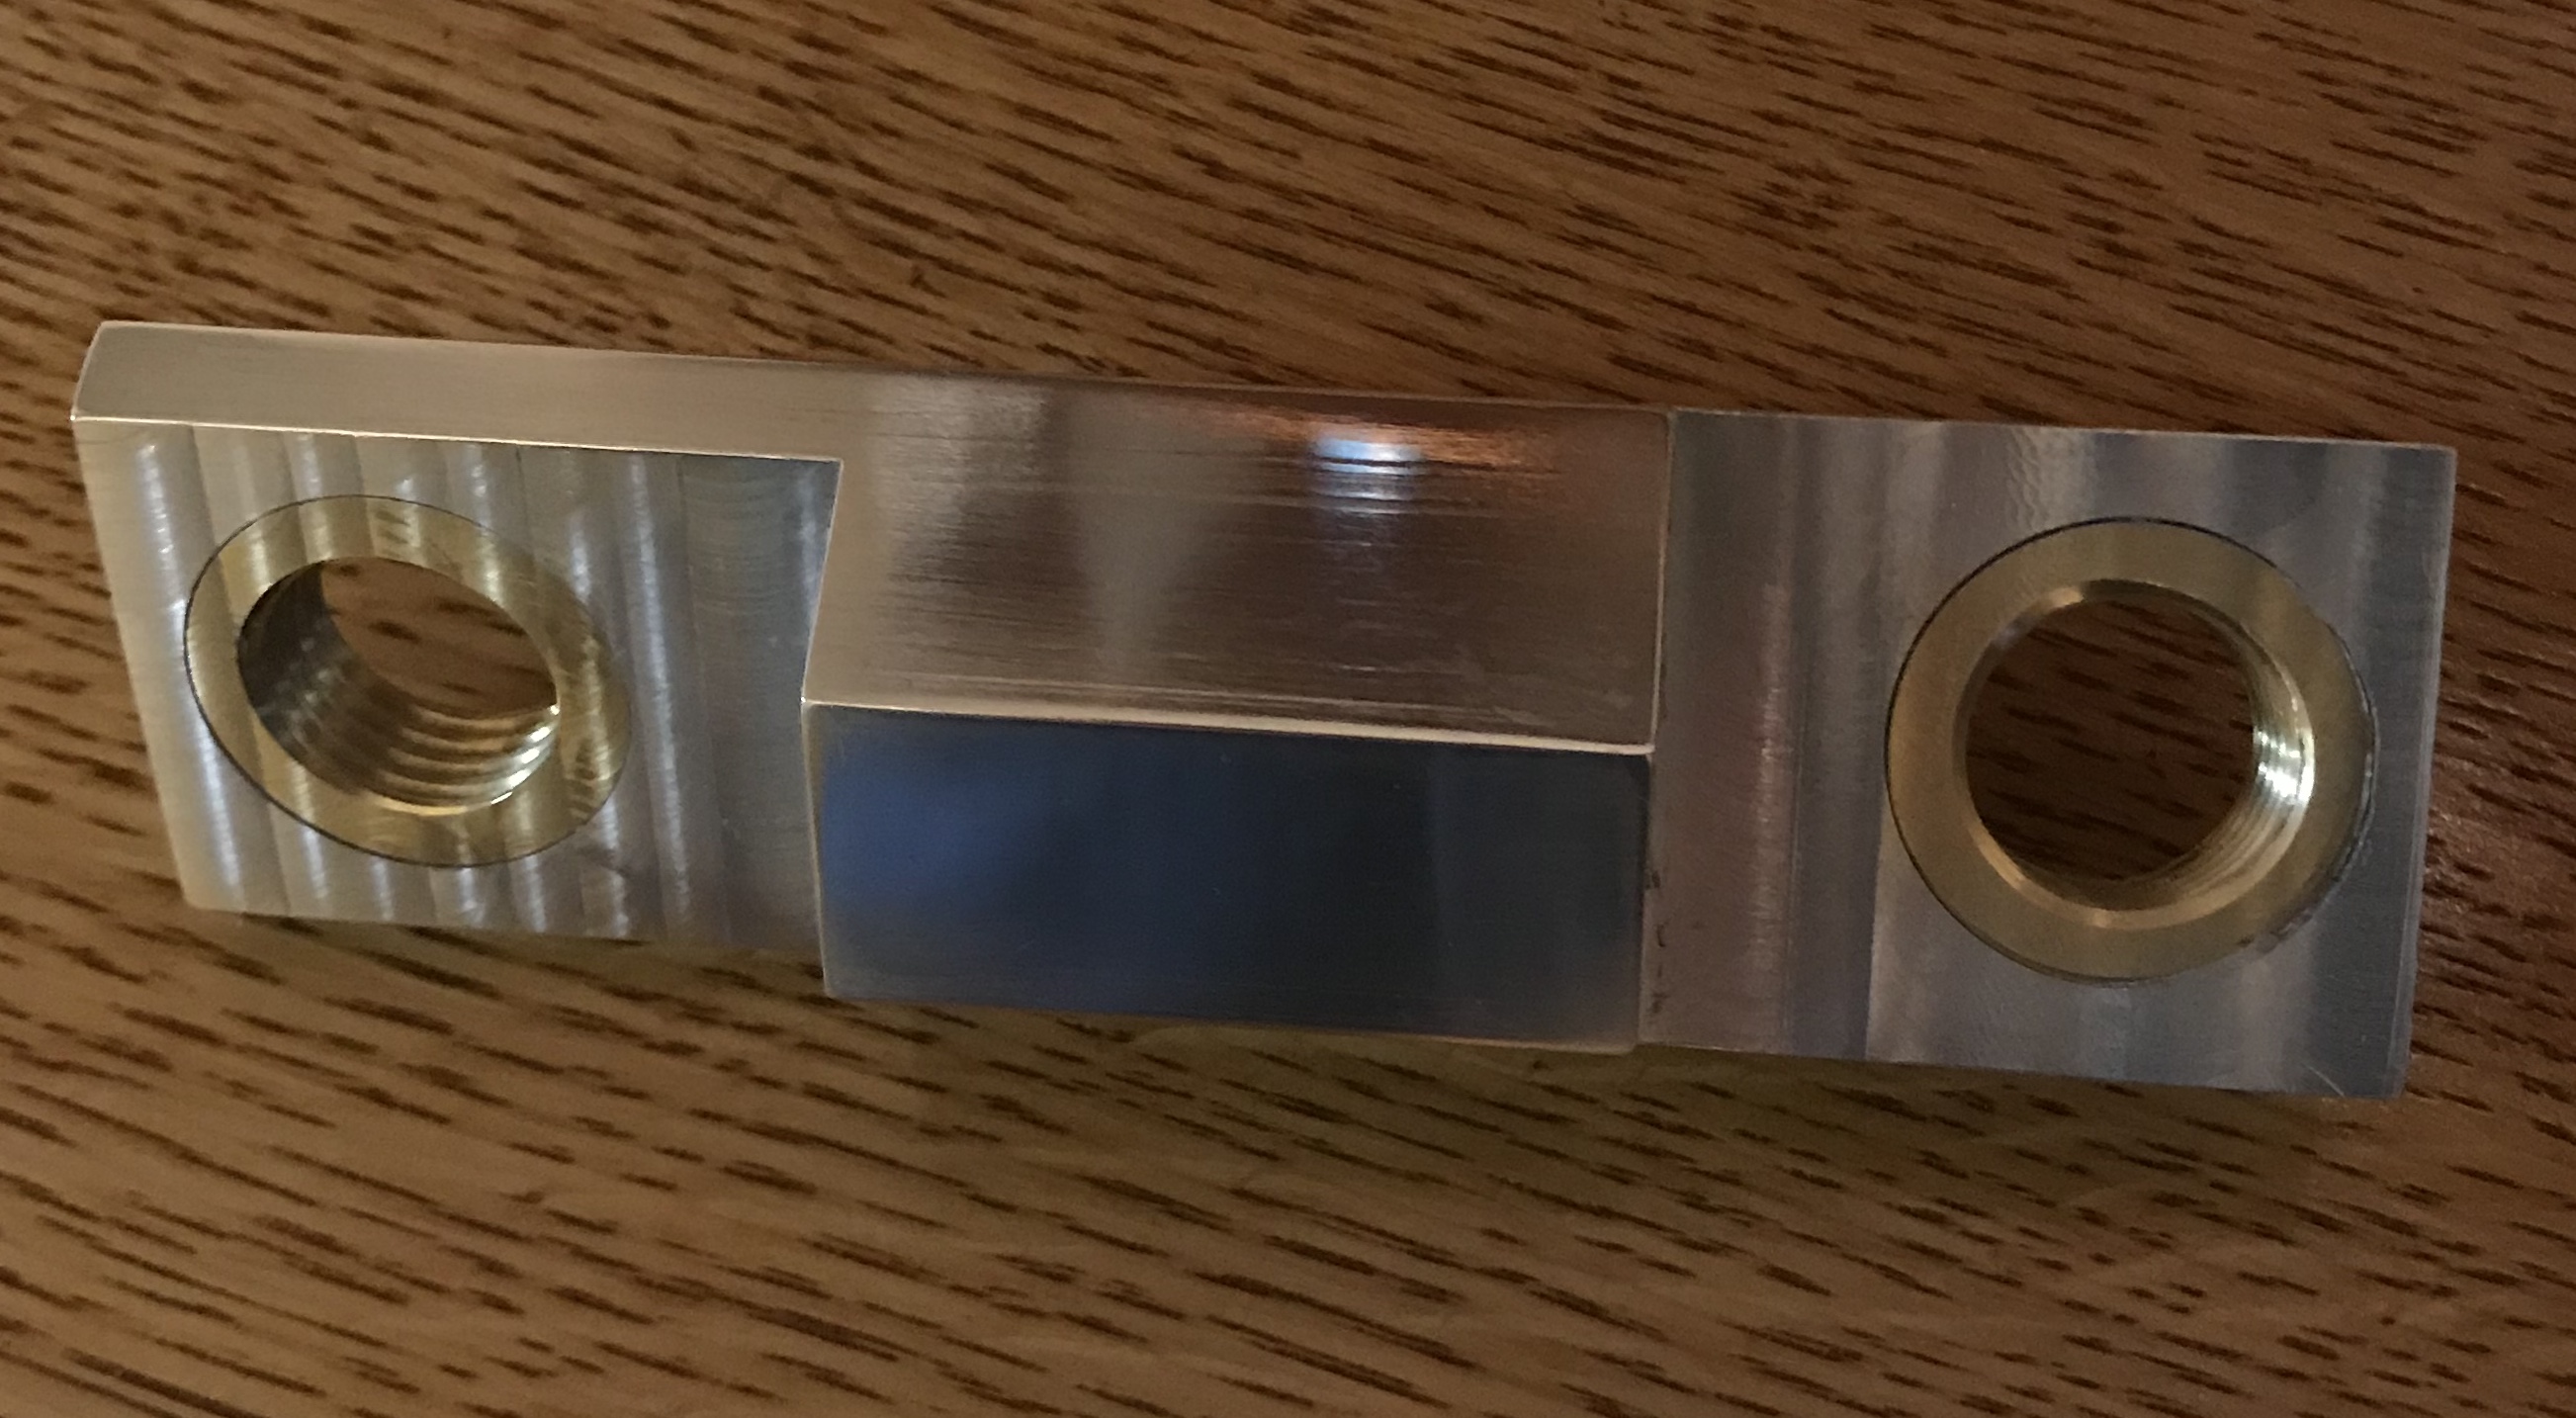
Attempting to screw the dremel into the installed insert highlighted a major design flaw. The lock button runs into the corners of the hexagon. Probably need to mill off 3/8" toward the center of the clamp and down to 1/8" the current level of the tab.
The second hole was drilled and bored as above. Took a measurement at 0.985" and decided to split the difference and took off 0.004". The next measurement was 0.996" and the insert slid right into place!!! I guess I am still struggling with measuring. Previous measurements on this hole were right in line with the cuts taken. And to think this seemed like the easiest way to put threads into this clamp. In any case the insert was glued in place with Loctite.
The final trimming to accomodate the lock button is all that remains besides some cleanup. The extra trimming will amount to about 3/8" of aluminum removal on the four sides of the two tabs. This was done, the clamp was sanded on the unmachined hex faces, and these were polished on the polisher with white rouge. A coat of paste wax was applied and buffed to complete the clamp.